bigger kite banners
This tutorial details a fairly quick and inexpensive method for creating big banners to fly from a kite.
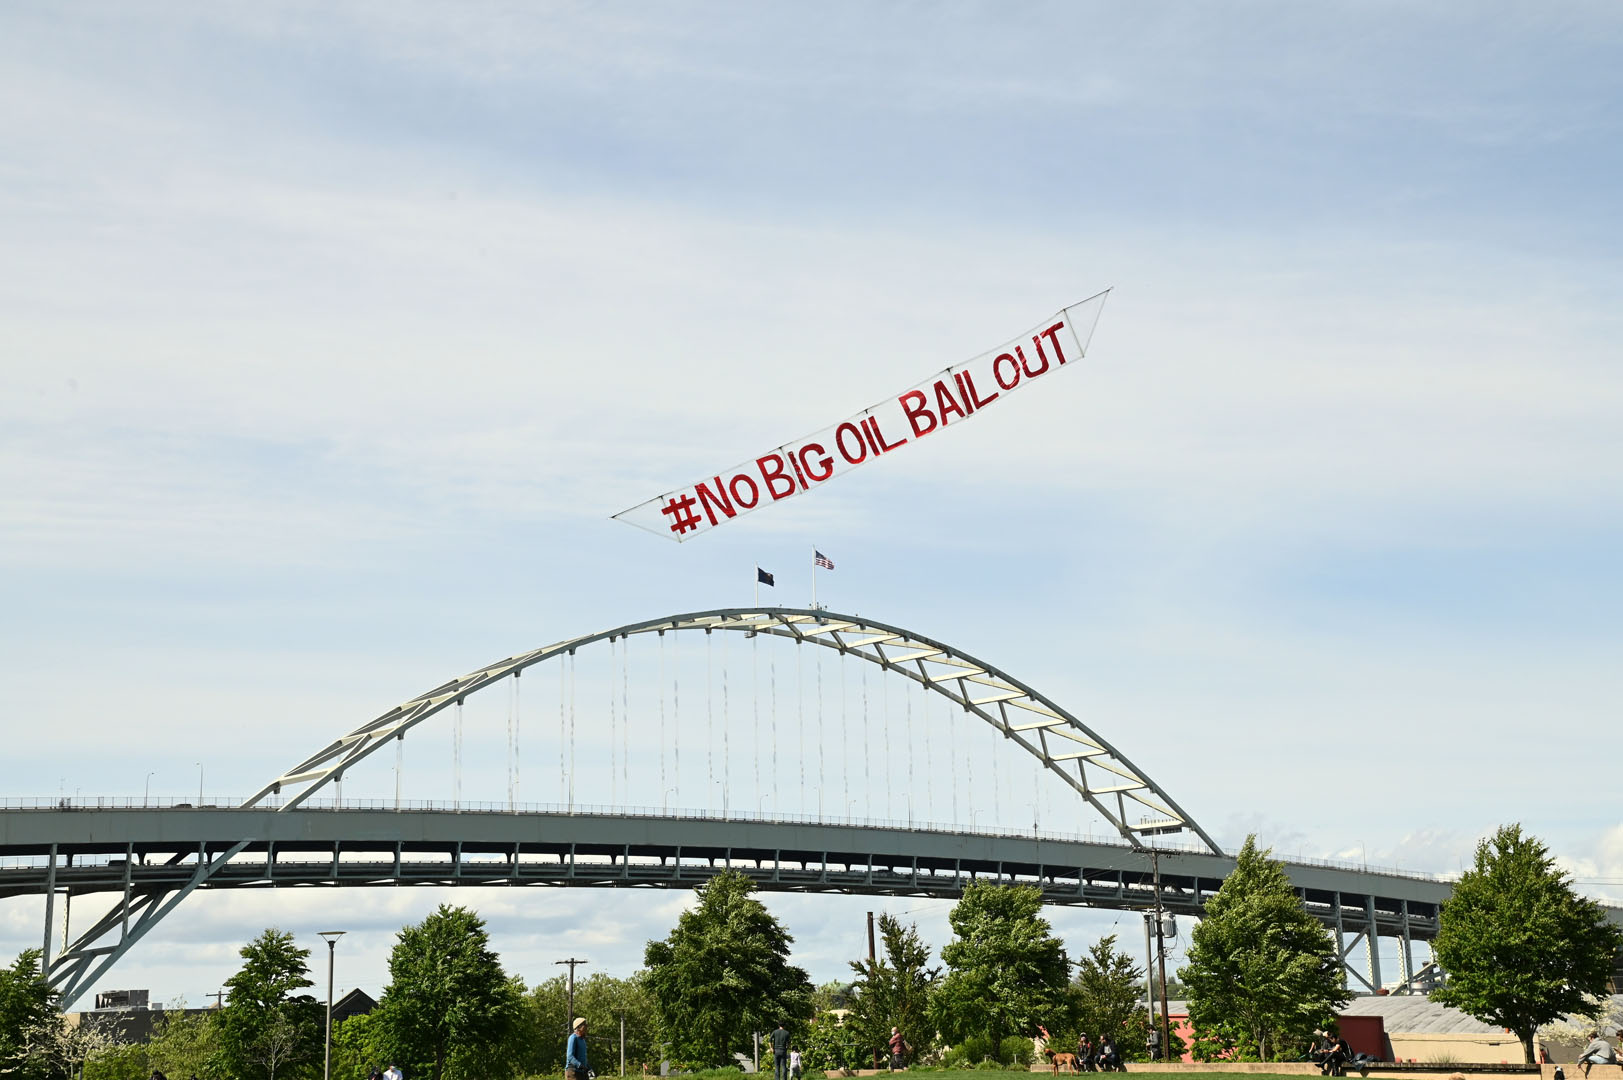
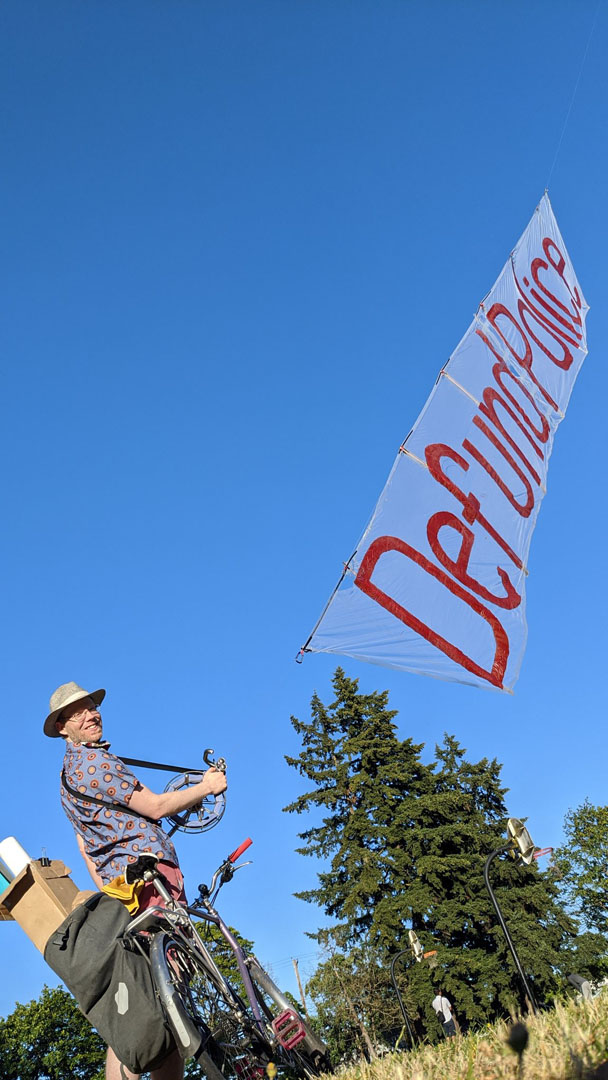
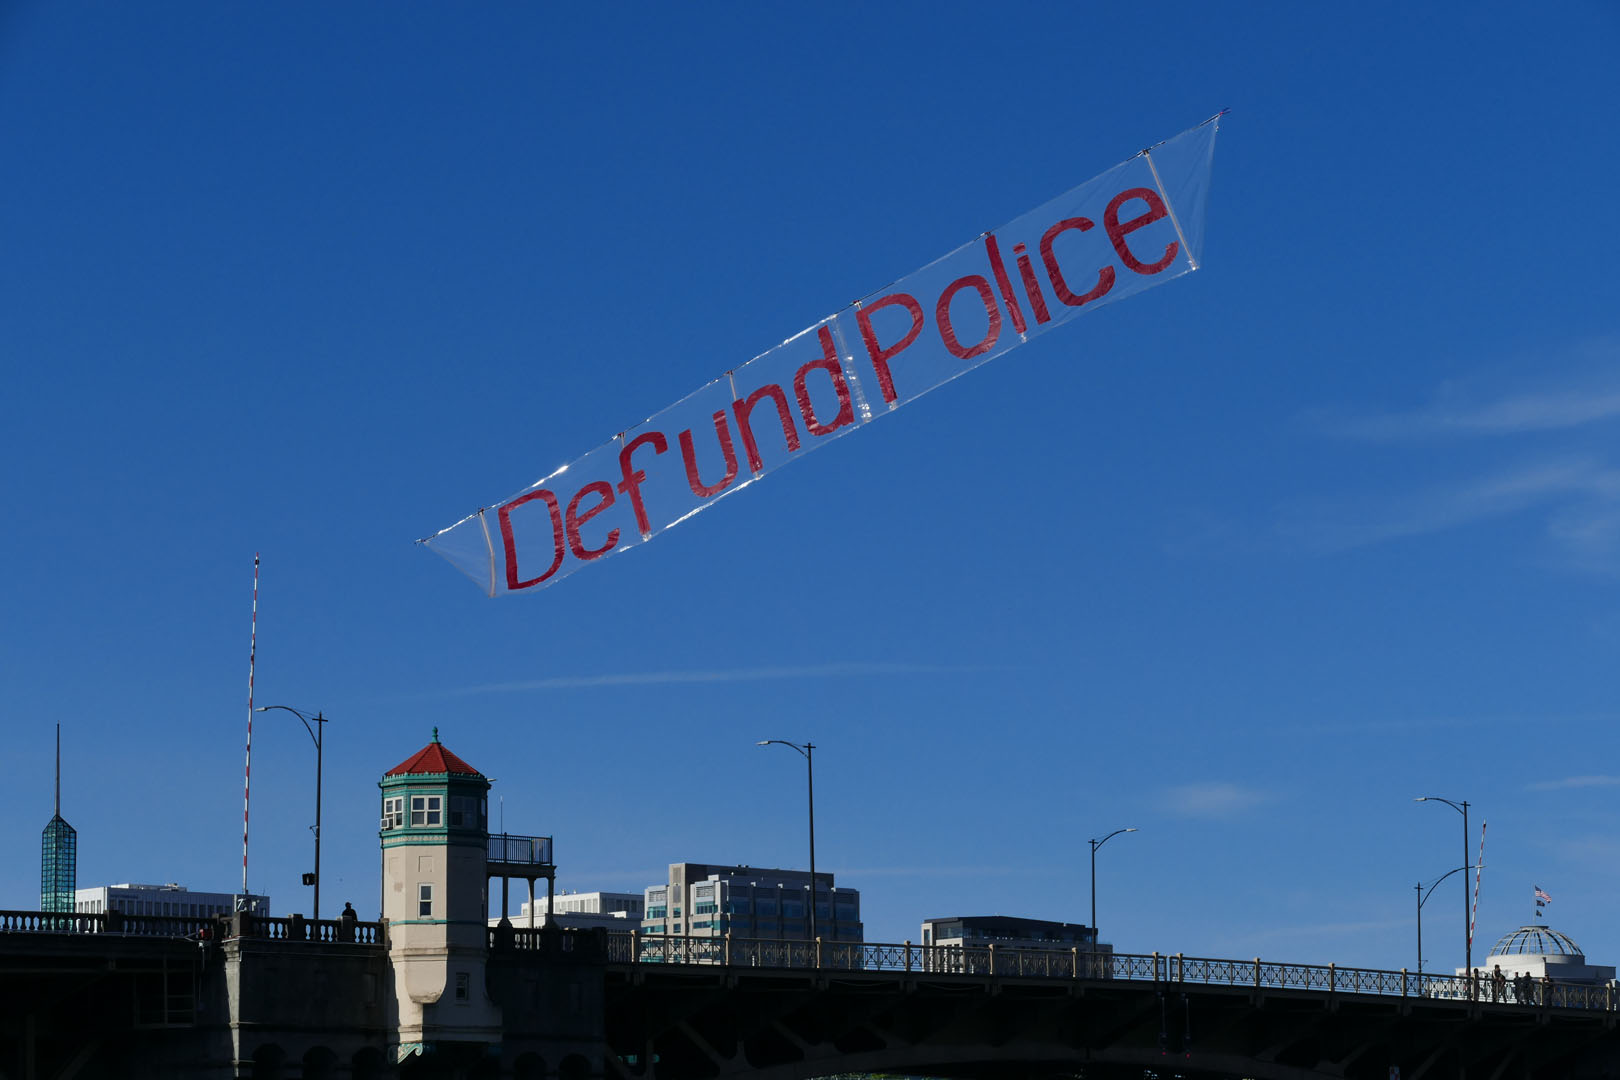
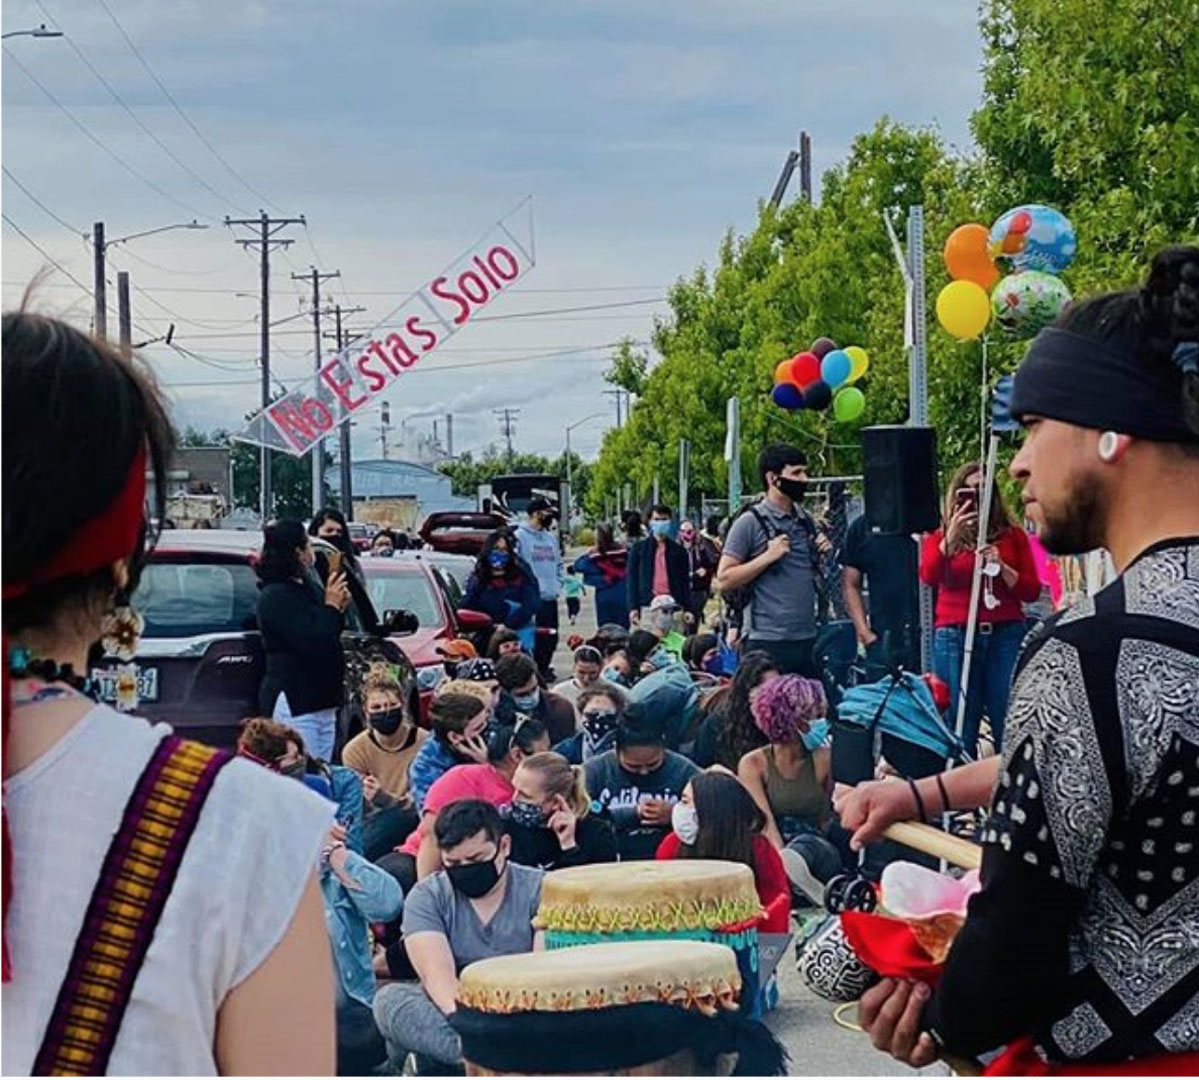
Header photo by Mike Hastie
Previously, I attempted paper banners, detailed in an earlier post and tutorial. While functional, the paper banners are fragile and can’t scale. This tutorial is based on the easily-available 54-inch-wide tulle; however, I am planning to try greater widths.
This tutorial assumes kite flying expertise. Please do not go flying kite banners without first learning to fly big kites, familiarizing yourself with the flying area and weather, and planning for an emergency. If you’re just getting started, see the American Kitefliers Association’s How to Fly a Kite.
banner basics
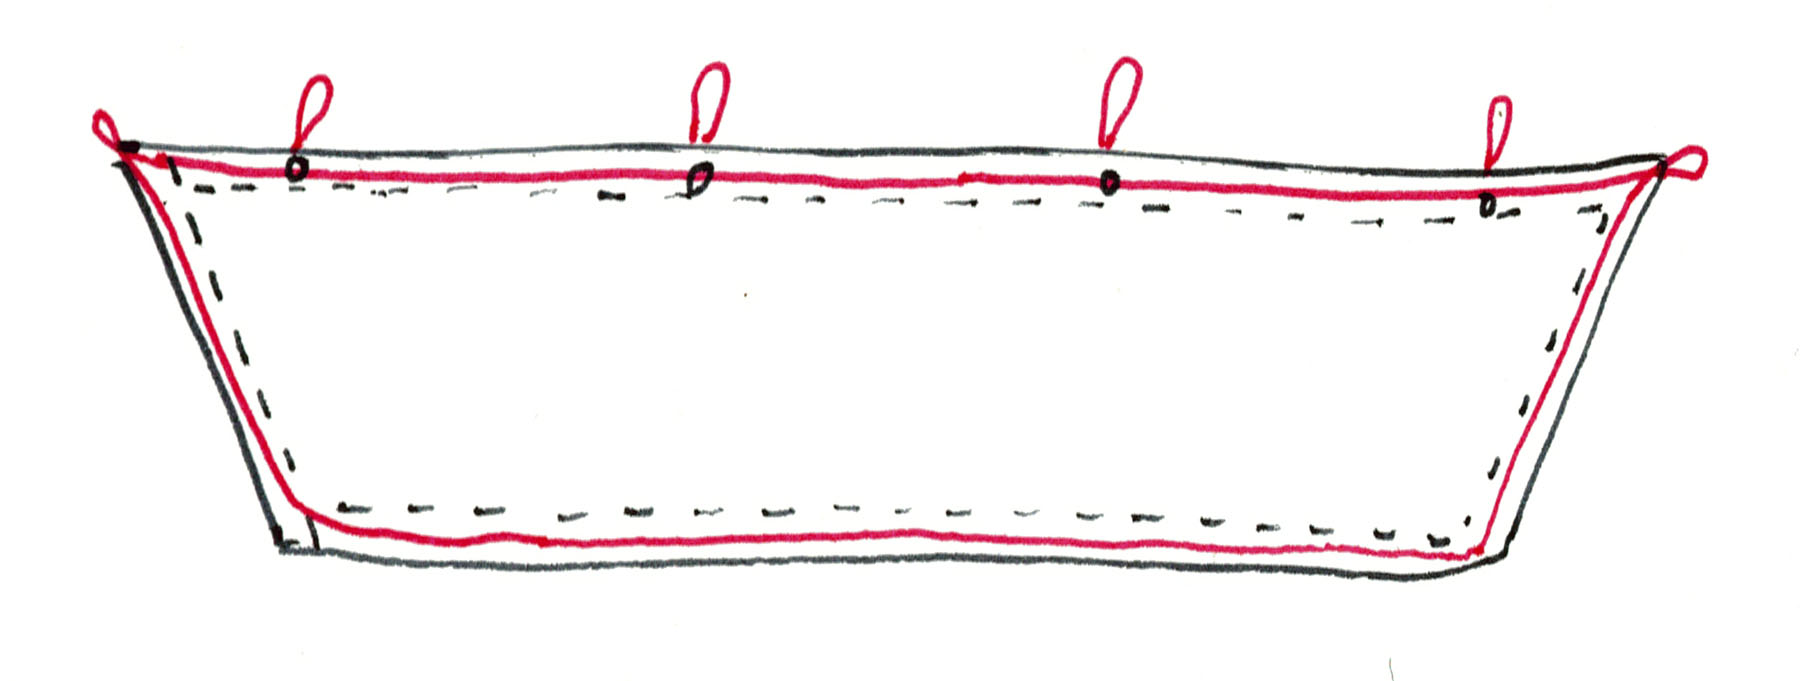
The banner’s structure is simple: a long rectangle with an edge reinforced by twine, held taught by rigid battens (sticks) and the tension of carabiners clipped into the kite line.
In the diagram below, the battens are blue, the twine is red, material edges are black, and reinforcement strips are dotted lines. The tulle is folded over the twine along the edges and additional strips of tulle hold the battens in place.
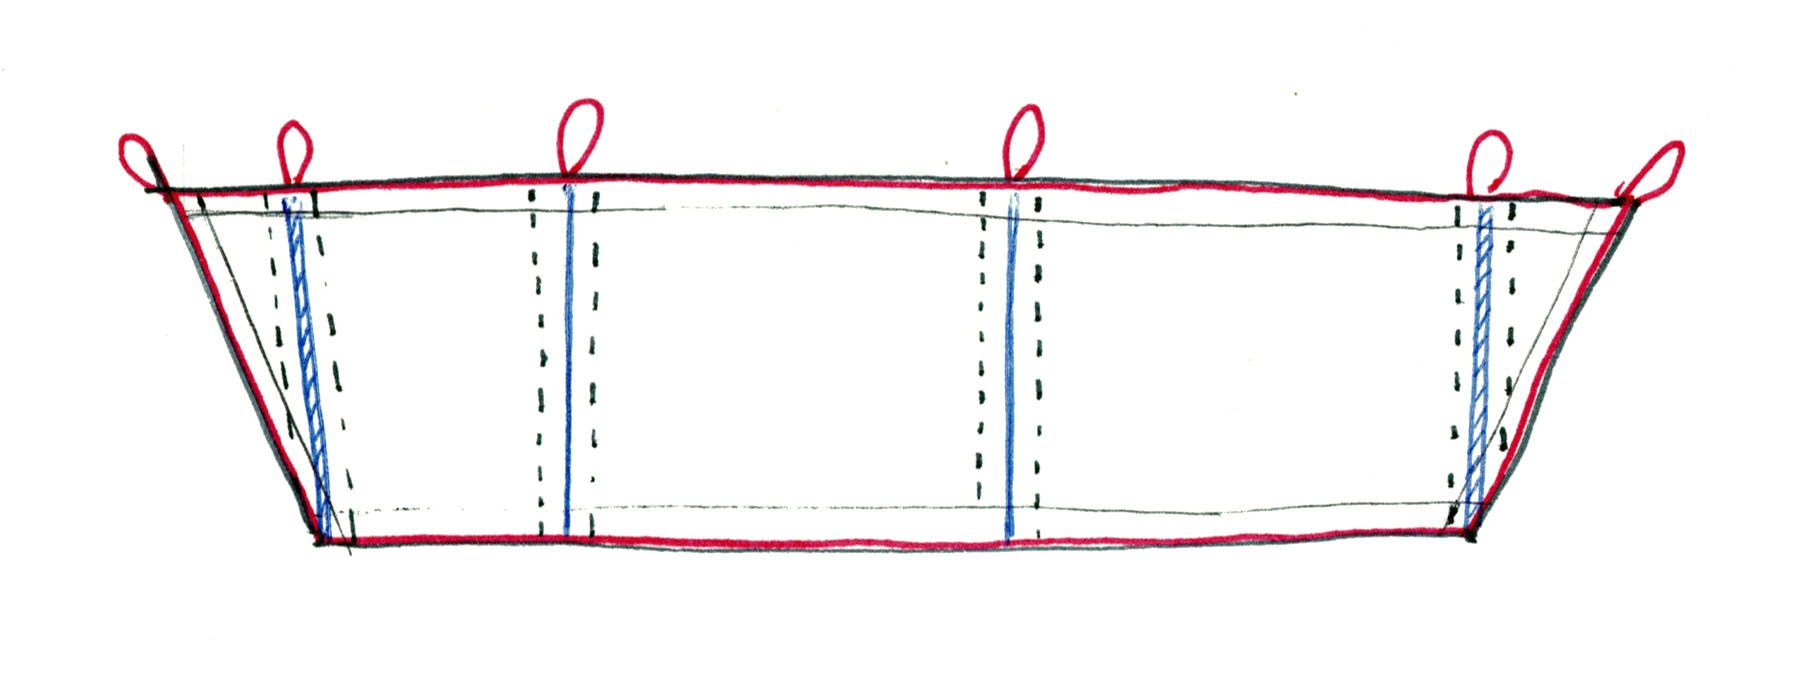
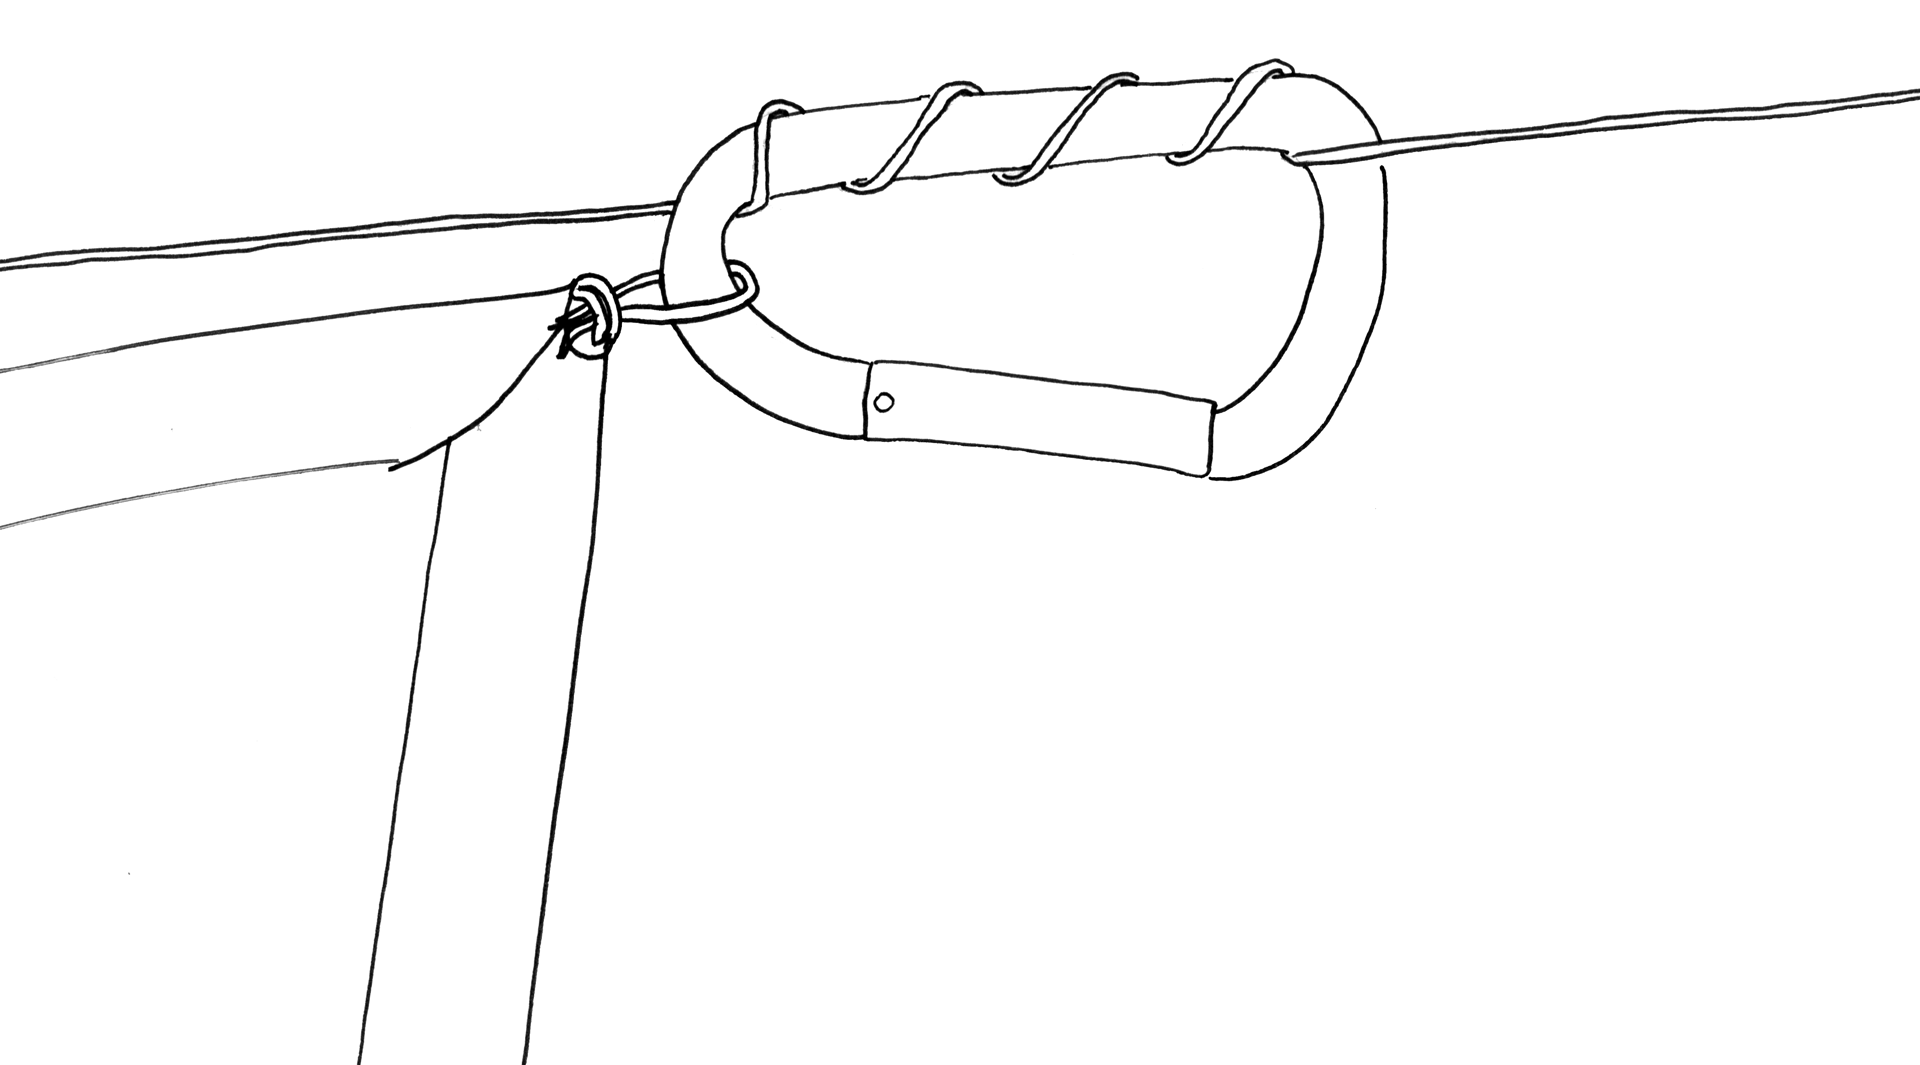
Carabiners clip to the loops of twine and are wrapped into the line.
Ideally, a sign will be made all at once on a flat surface and left to dry over night. To accomplish this, the message should be planned ahead of time, scaled to the length of the banner, and the locations of battens (sticks that keep the sign from flapping in the wind) picked out. The size of the banner should also fit within the available space.
Although slightly trickier, the sign can also be made in multiple pieces and assembled.
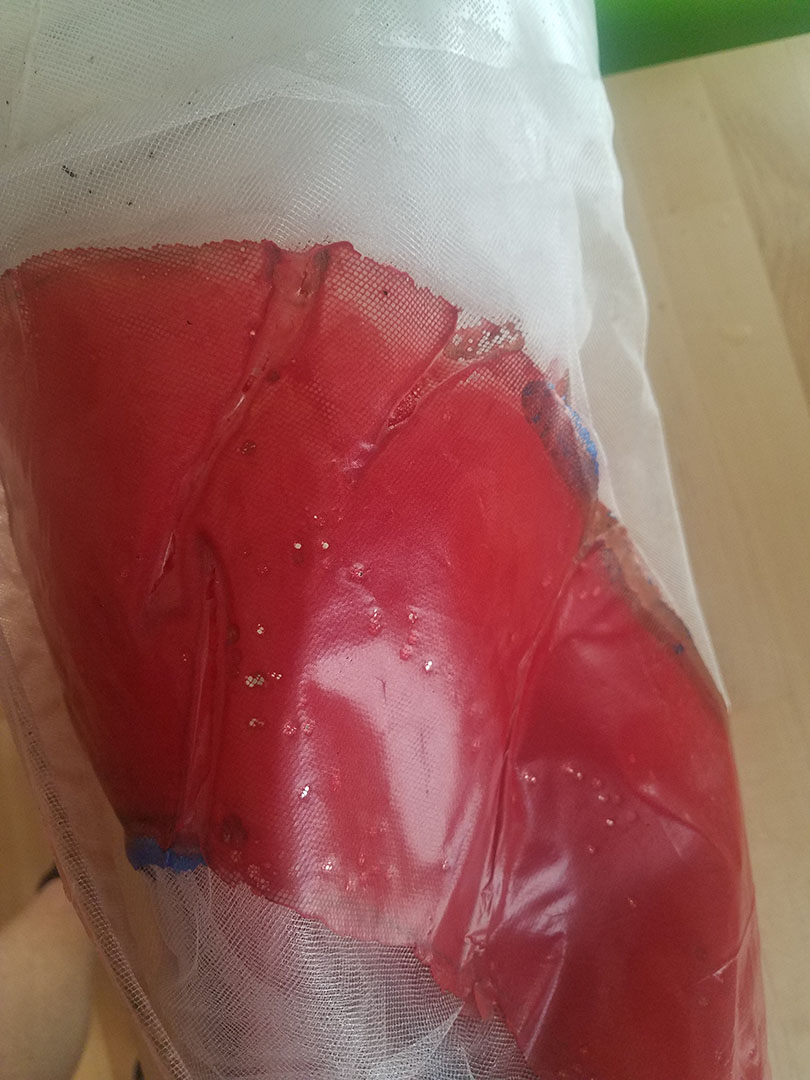
The “paint” is dilute, water-based PVA glue (white glue, i.e. Elmers) mixed with fabric dye which fills in the tulle’s mesh to create a vibrant, translucent film that glows in the sky.
supplies:
materials
- white polyester tulle
- 54 inches wide and long enough for your message
- Rit fabric dye (or similar)
- to color glue for lettering/painting
- I suggest red for sky lettering. It glows and is more visible than black.
- gallon of PVA glue
- white glue, i.e. Elmers
- a sign will use about 1/3 of a gallon of glue
- polyethylene tarp
- i.e. painter’s plastic
- long enough to lay under your message
- masking tape or painter’s tape
- used to hold tarp in place
- two buckets for mixing glue
- natural fiber twine, 50 pound test or stronger
- i.e. hemp, sisal, etc.
- synthetic will not work; rough, absorbent natural fibers hold glue
- bamboo strips, wood lathe, dowels, or other lightweight stick for battens
- must be as long as the tulle’s width
- 2 large aluminum carabiners, 50 pound rating or more
- 4-6 smaller carabiners
tools
- 6-inch paint roller handle
- a half-width roller is a good width for letters
- a handle extender is helpful
- 3-inch roller or paint brush
- for gluing the edges to the twine
- roller tray
- sharp fabric cutting tool for tulle
- weights for holding tulle in place (paint cans, rocks, etc.)
planning the banner
pick a message
Since the message determines the length of the banner and the material needed, start by picking a short message and drawing the letters to scale. Estimate the width of your standard letter to quickly estimate the length. I’ve used a 2-foot wide, 4-foot high standard letter on 54-inch-wide tulle. After finalizing the message, I’ll then refine my estimated length by making allowances for narrow letters like a lower-case “l” and adding the two triangles to the sides.
I think 35 feet is about the maximum length for a sign that a one-person kite can lift. For instance, my 54-inch-high “Defund Police” banner is 27 feet long.
To my eye, a mix of lowercase and capital letters creates the most compact and legible sign at a distance, although these letters are somewhat trickier to paint and plan. Evenly-spaced capital letters are simpler to paint and plan. However, They can be harder to read, especially if narrow. Symbols are hard to read.
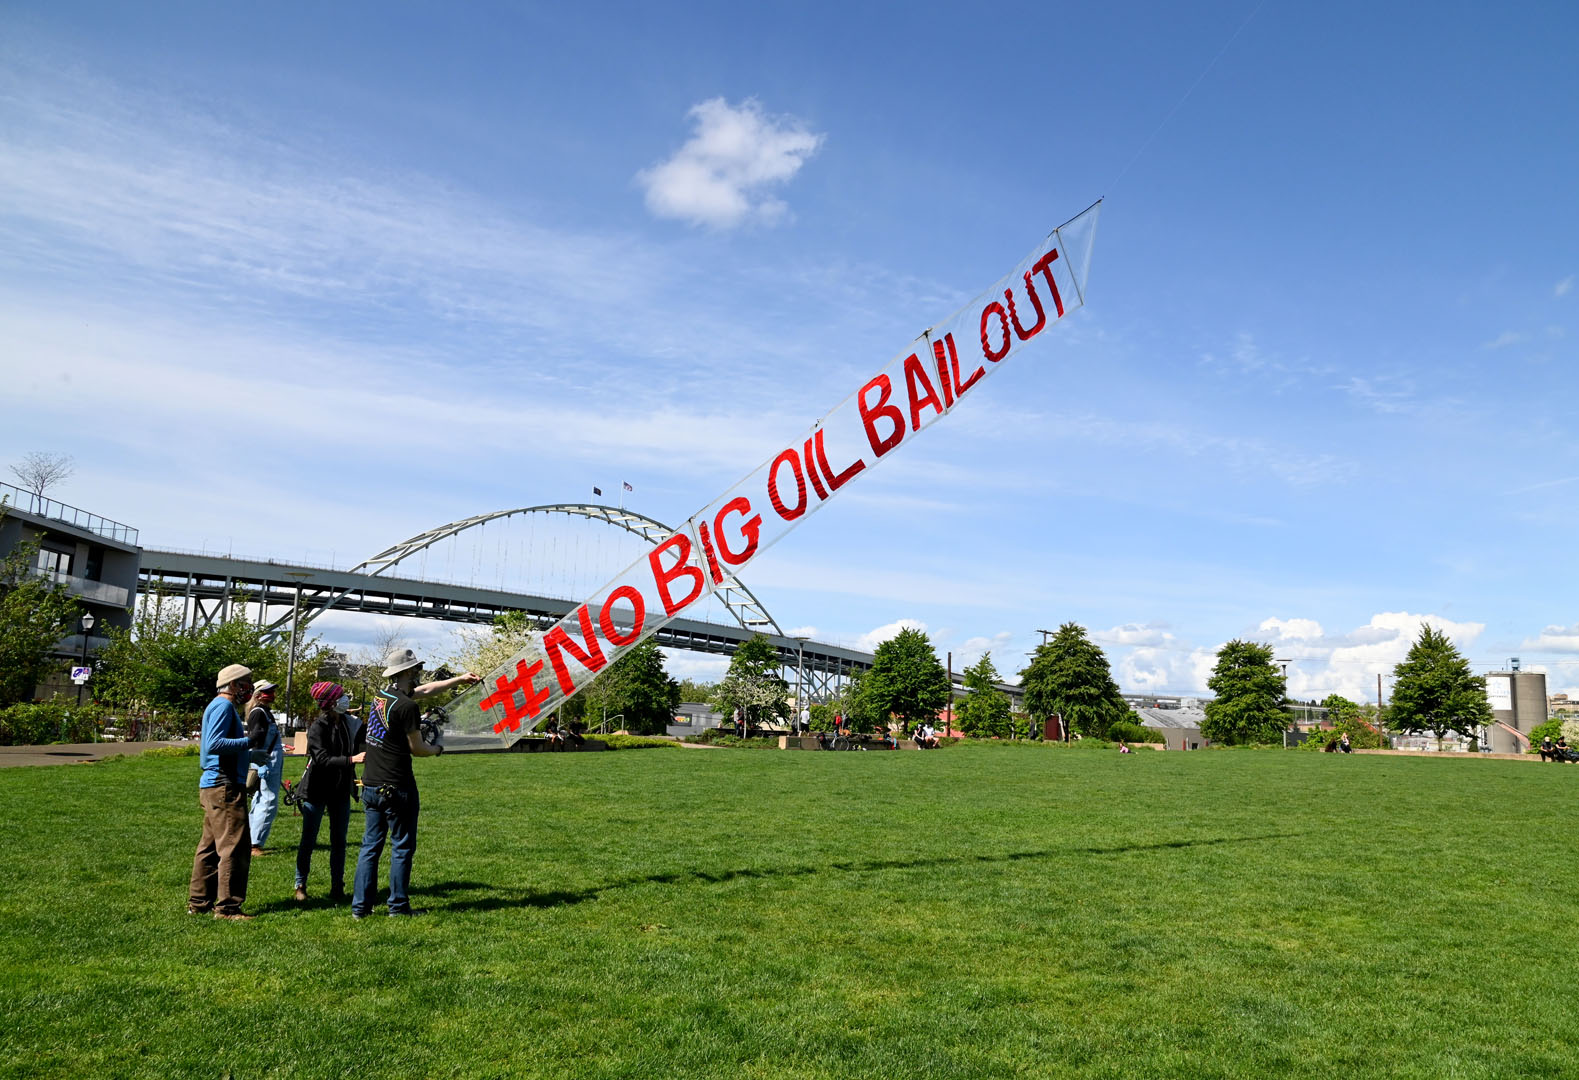
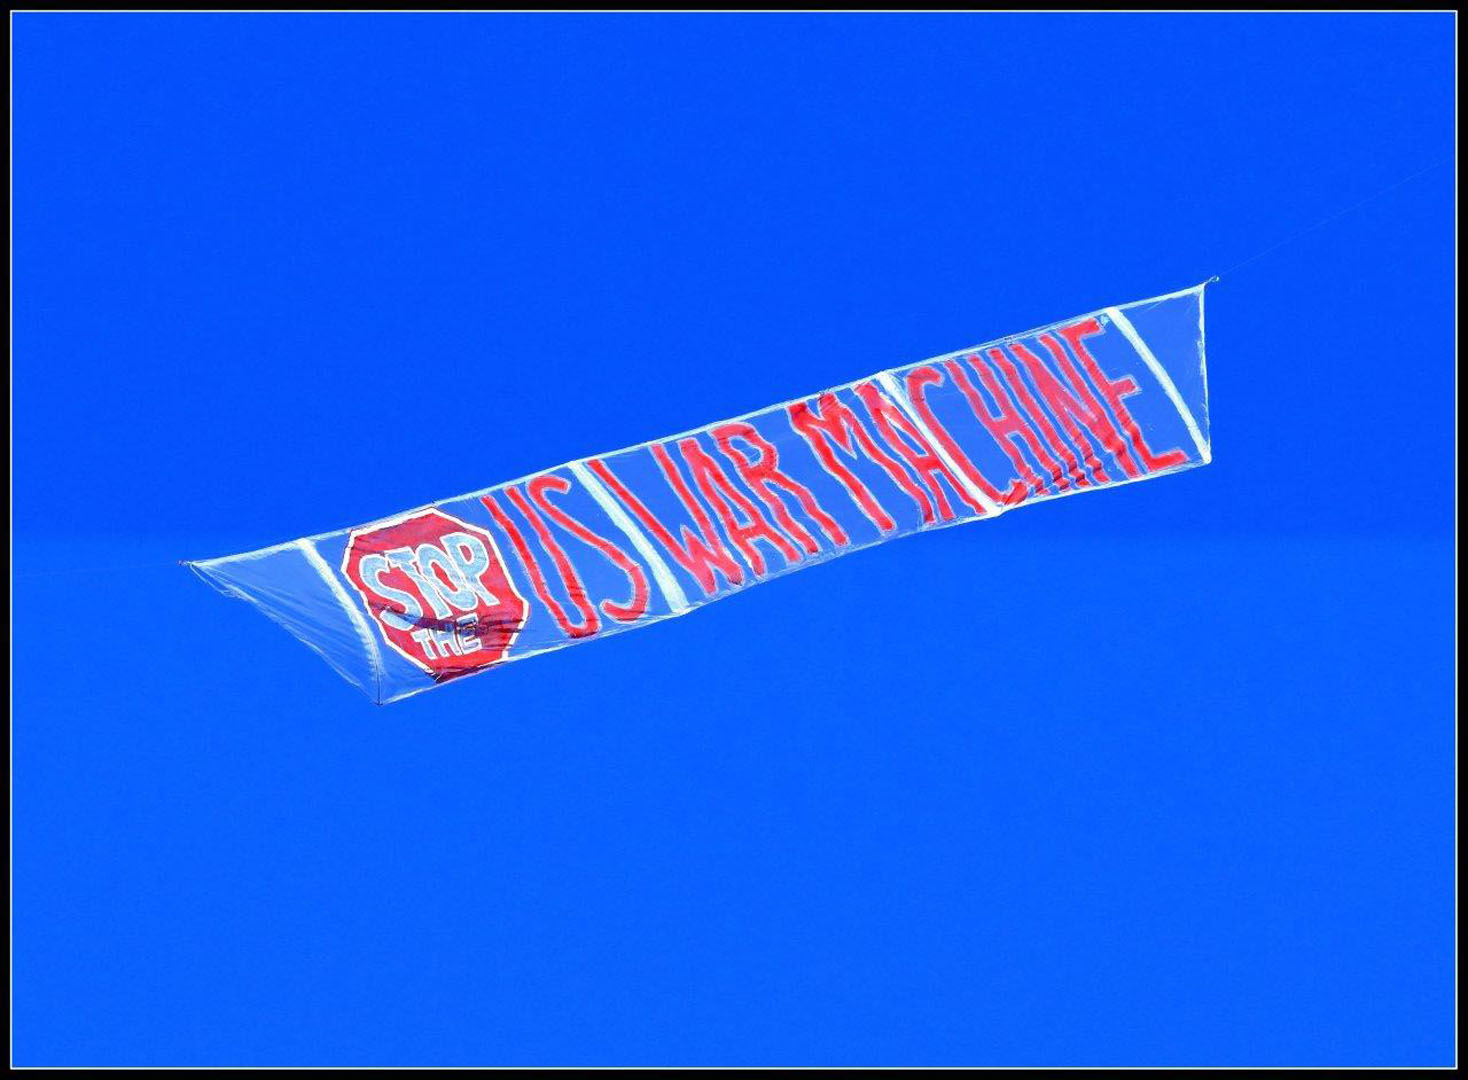
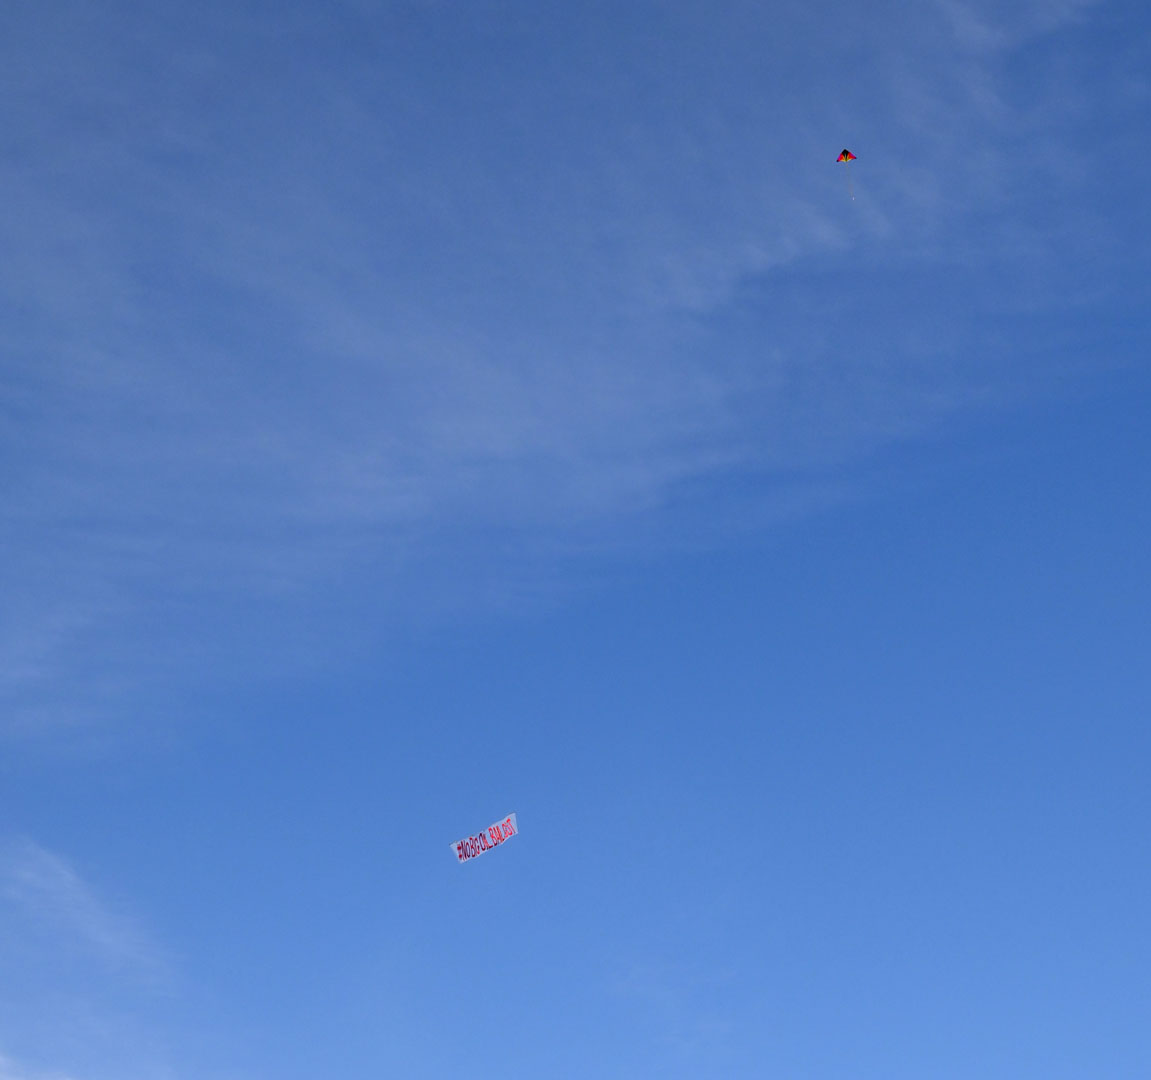
Most people will read this message from a long distance away or in tiny letters of a cellphone photo. No matter how big the message is, the sky is much, much bigger.
plan the locations of battens (sticks)
Two fairly stiff battens should be at the vertical sides of the banner’s two triangles. The battens minimize flapping, since flapping lowers legibility and also stresses the kite line attachment points.
The other battens are optional. I find a few extra battens keep the sign from sagging in the middle. They can be very thin, and their placement doesn’t need to be regular. They are only needed every 6 to 10 feet.
Hide the battens behind the vertical sections of letters or place them clearly in the space between letters. Don’t place them at the edges of letters, as that can disrupt the silhouette.
For instance, in the banner below, there is a batten hiding behind the “f,” “n,” “P,” and “l.”
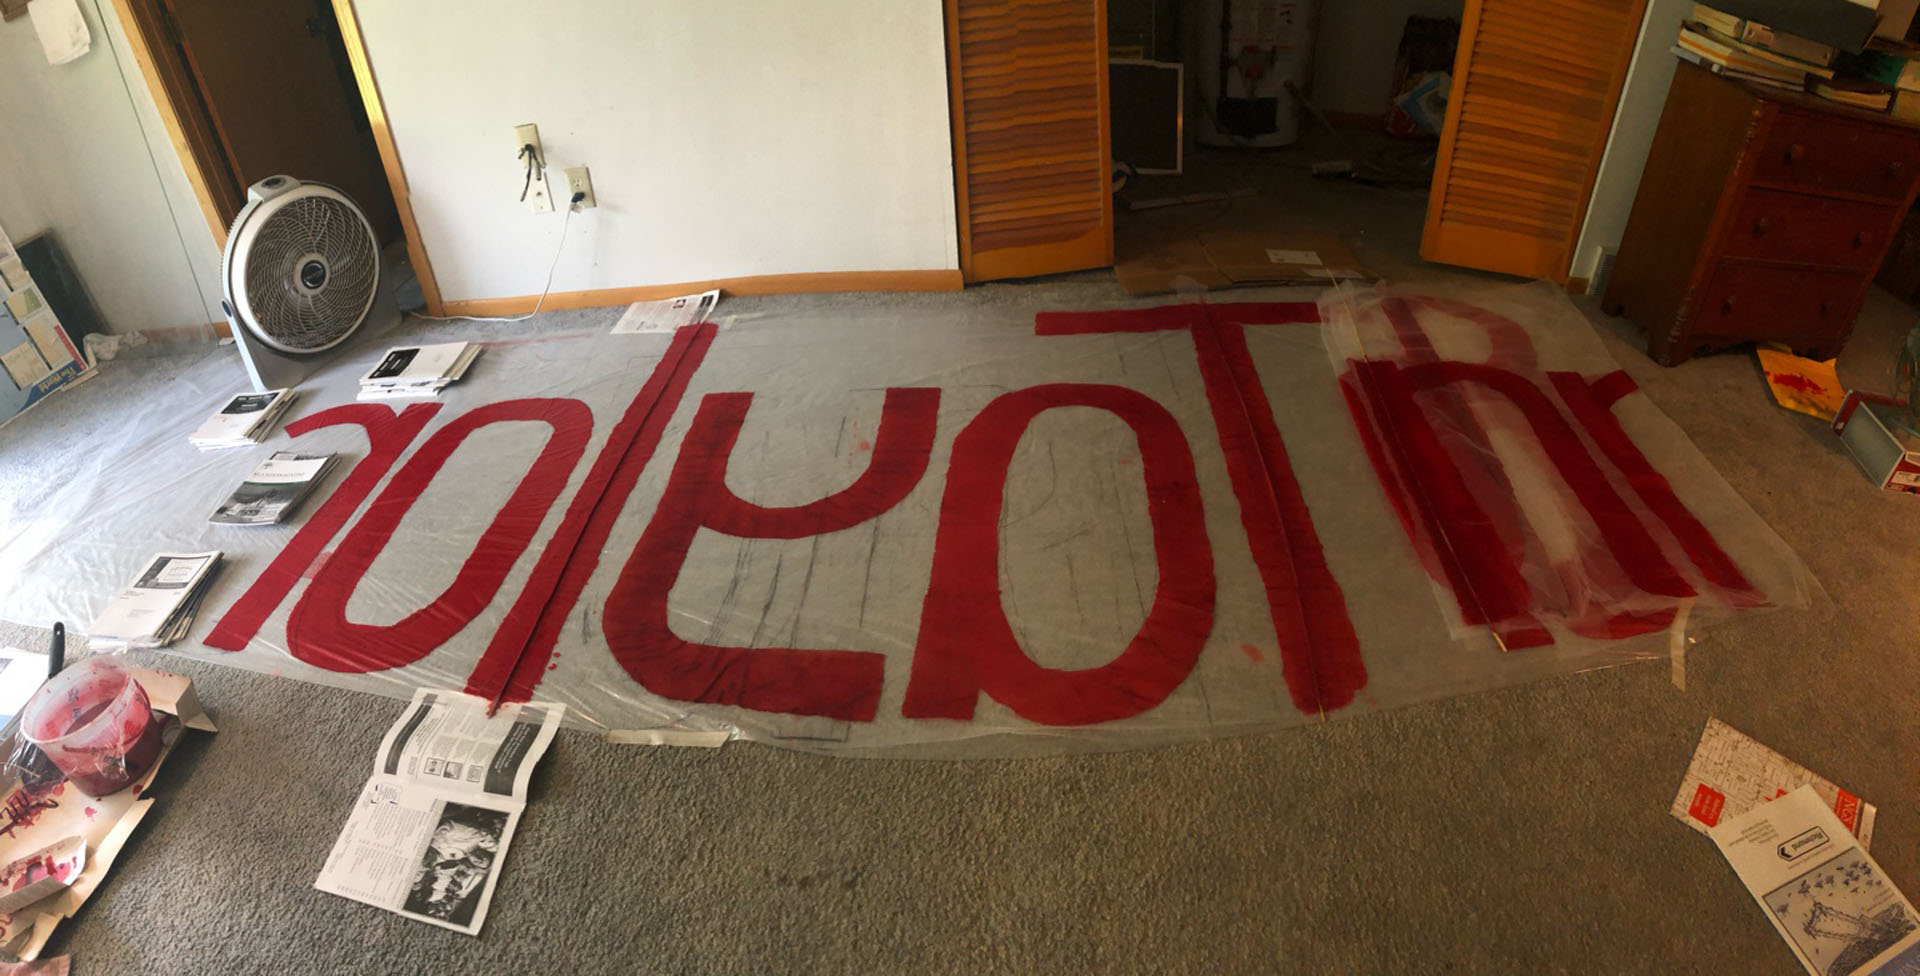
In the above example of Breonna Taylor sign, Jayne Meacham painted the letters backwards (face down) in order to glue the battens to the back side of the banner, giving it a clean look and also attaching the battens at the same time as the letter painting.
I do not suggest building the banner without any battens; however, kite tails strategically attached to the bottom edge of the banner can pull it fairly taught.
prepairing the area and supplies
mixing glue & paint
PVA glue should be thinned, 1 part glue to 2 parts water, and mixed thoroughly. About a gallon of this thinned glue is needed for a sign– a quart of glue for the edges and the rest for the letters. One packet of fabric dye can color up to a gallon of this thinned mixture into paint for the letters.
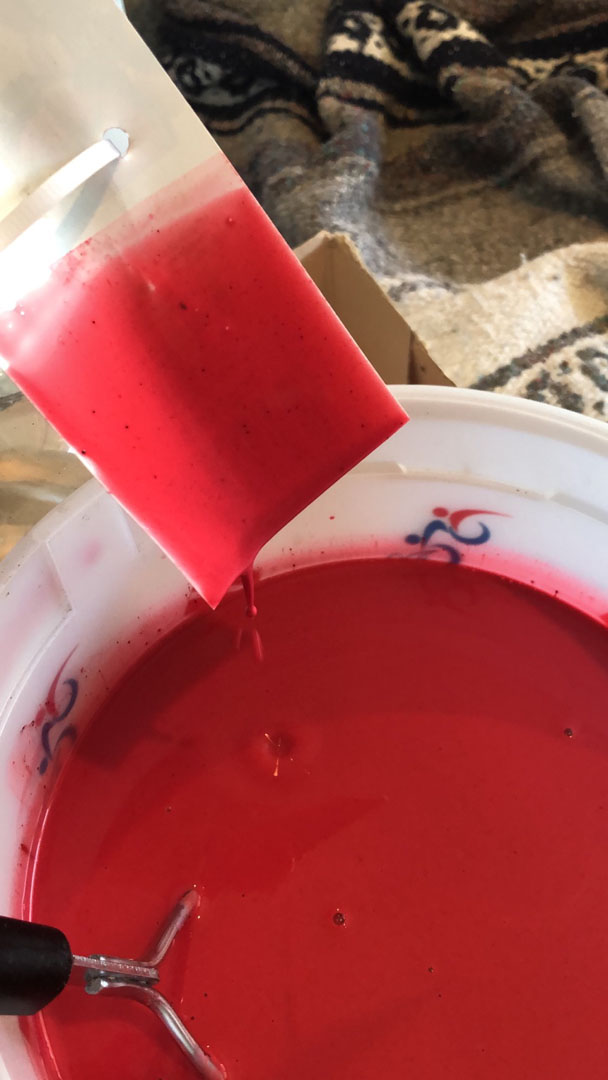
The paint mixture’s color will intensify as it dries. The pinkish glue/paint above made the intense color in the Breona Taylor sign above.
I’ve tried some other colorants, including house paint, alcohol ink, and poster paint, but Jayne’s suggestion of fabric dye not only gives the most vibrant color, its the cheapest (by far!) and easiest to find.
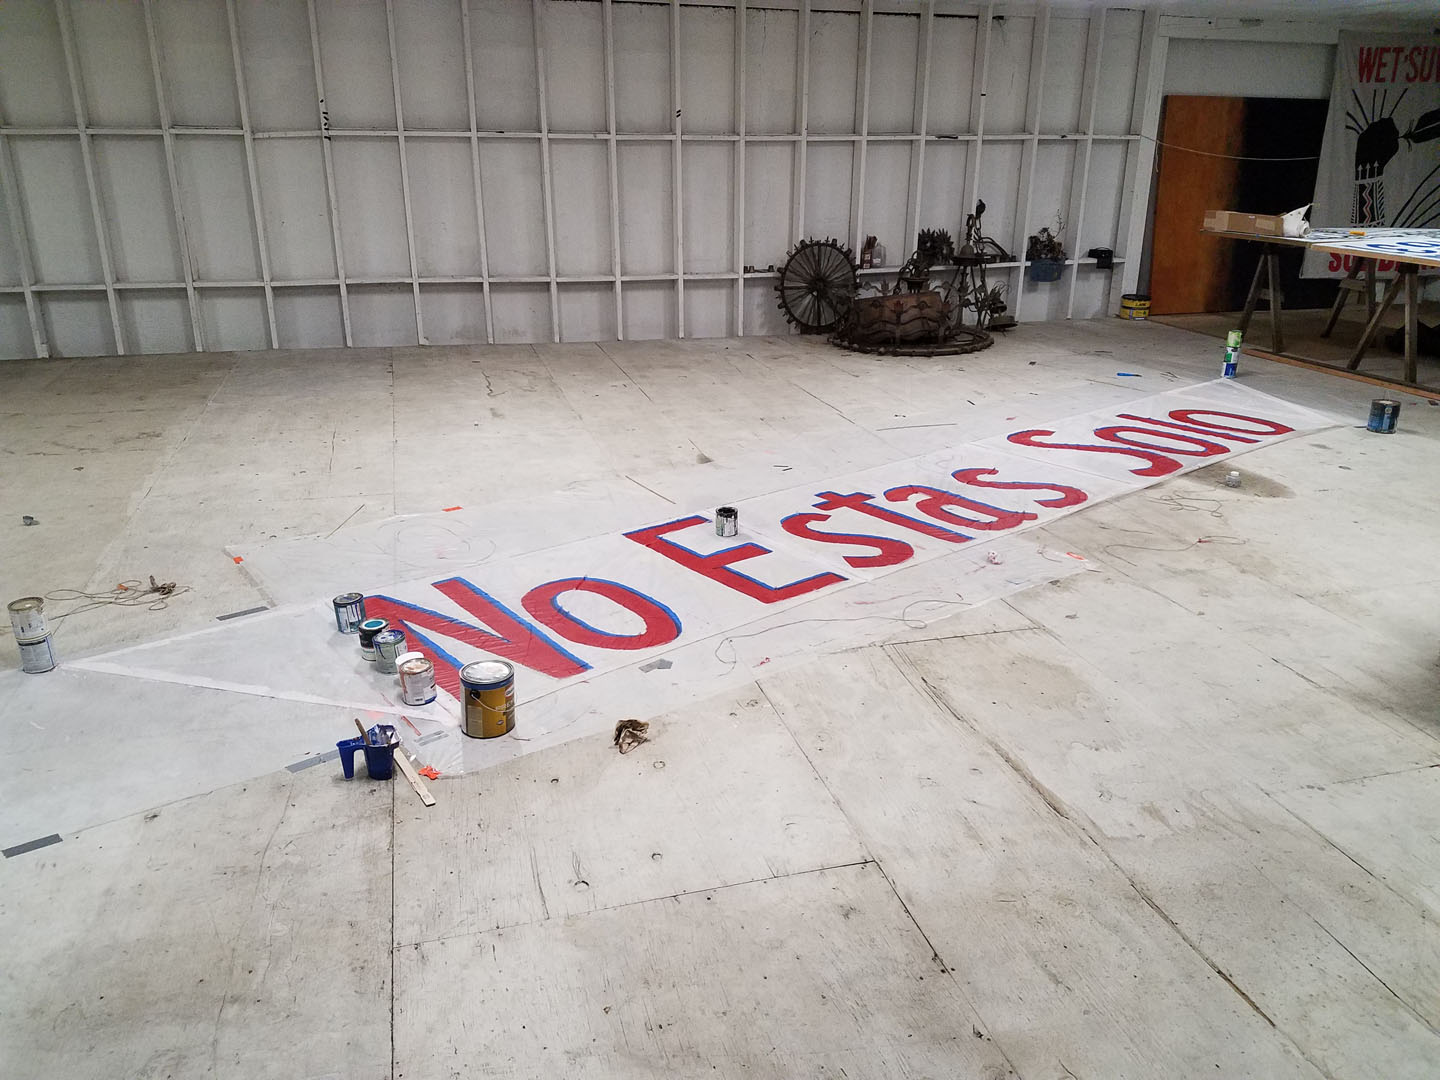
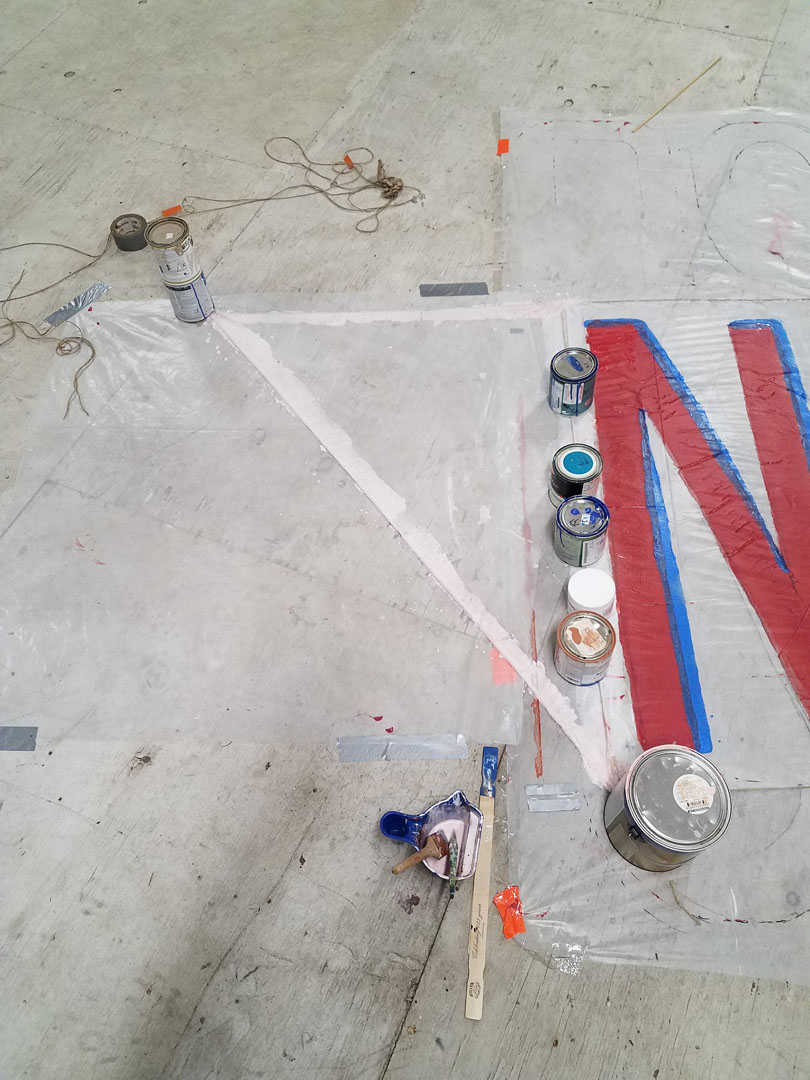
surface prep and letter layout
Lay the polyethelyne tarp down, stretch flat, and tape in place. The flatter the surface, the more consistent the film of paint will be when dried and peeled from the tarp.
Get some weights ready to hold the banner and twine in place.
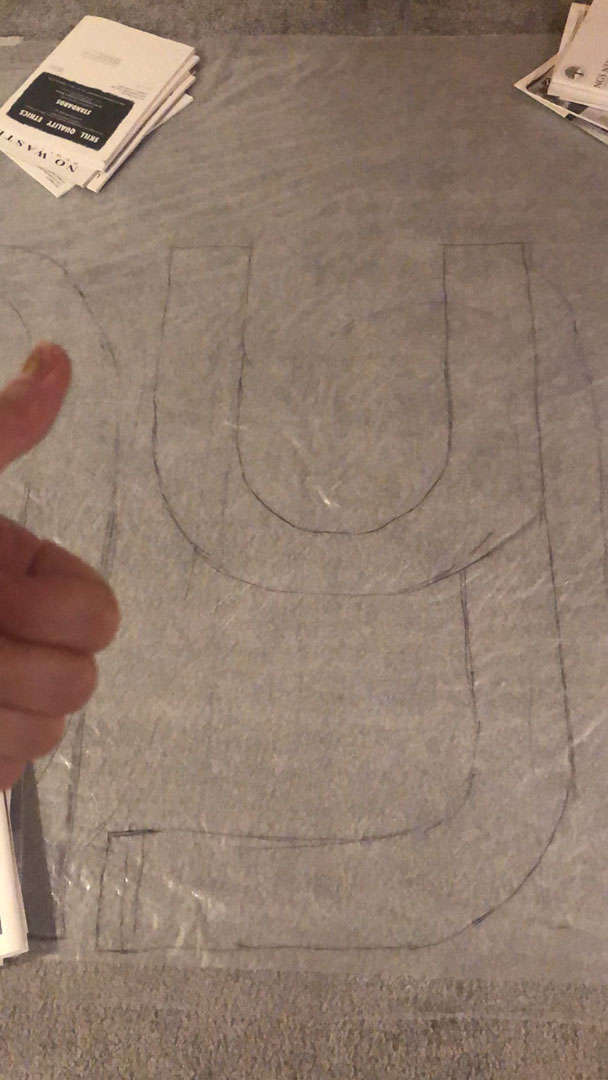
Lay out the tulle and mark the locations of the battens. Mark the locations of the letters and sketch a level of detail you need to paint them. You can mark letters on the tulle with a thick sharpie. The tulle’s mesh doesn’t show marks from even 10 feet away.
edging the banner
Pull twine taught across the top of the banner and tie loops, starting at one corner and working across to the locations of each batten until the far corner is reached. Do not cut the twine, as you will work it around the outside edge in one big loop.
Stretch the twine taught 3 inches down from the top of the sign and pin in place using weights on the two end loops.
Continue stretching twine around the side triangles and bottom of the tulle, 3 inches in. Use weights to hold it in place on the bottom triangles. Lay the twine down before cutting the side triangles, and, using the edge of the twine as a rough guide, cut the tulle off 3 inches out from the twine.
Trim the triangle cut-offs of tulle into roughly 5-inch-wide strips for use holding the battens in place.
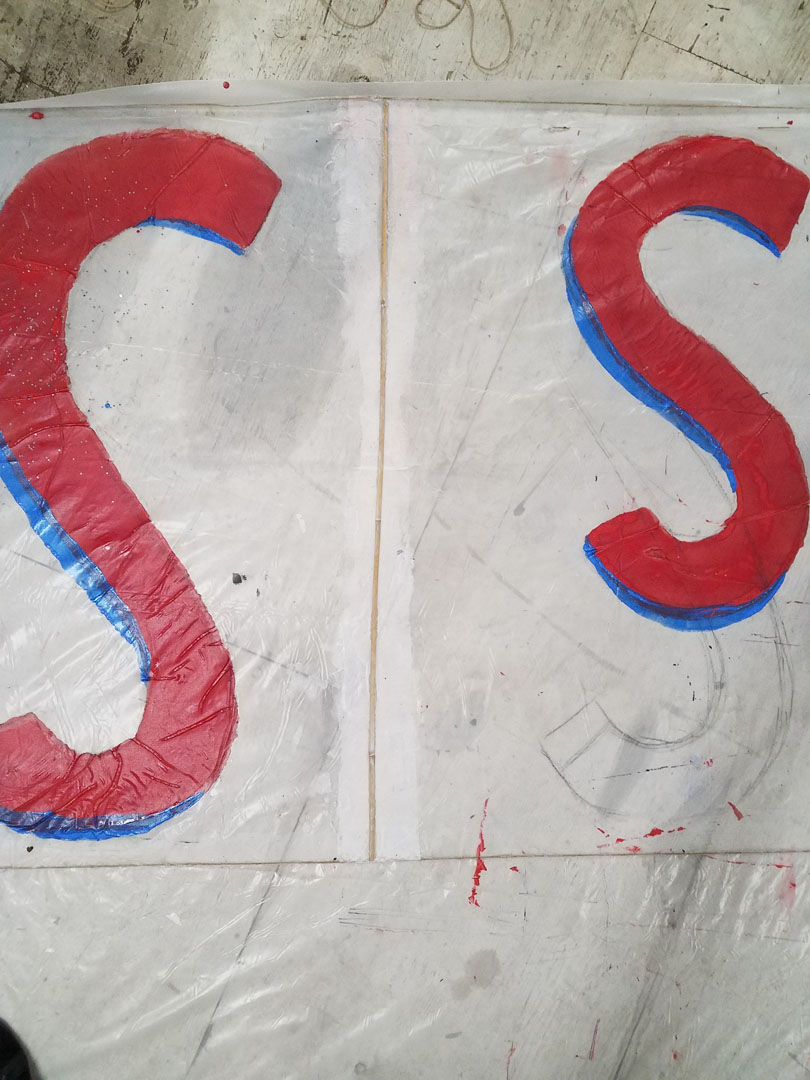
gluing and painting
Multiple people can work on the banner at the same time, and edging the banner with glue and painting letters can happen simultaneously.
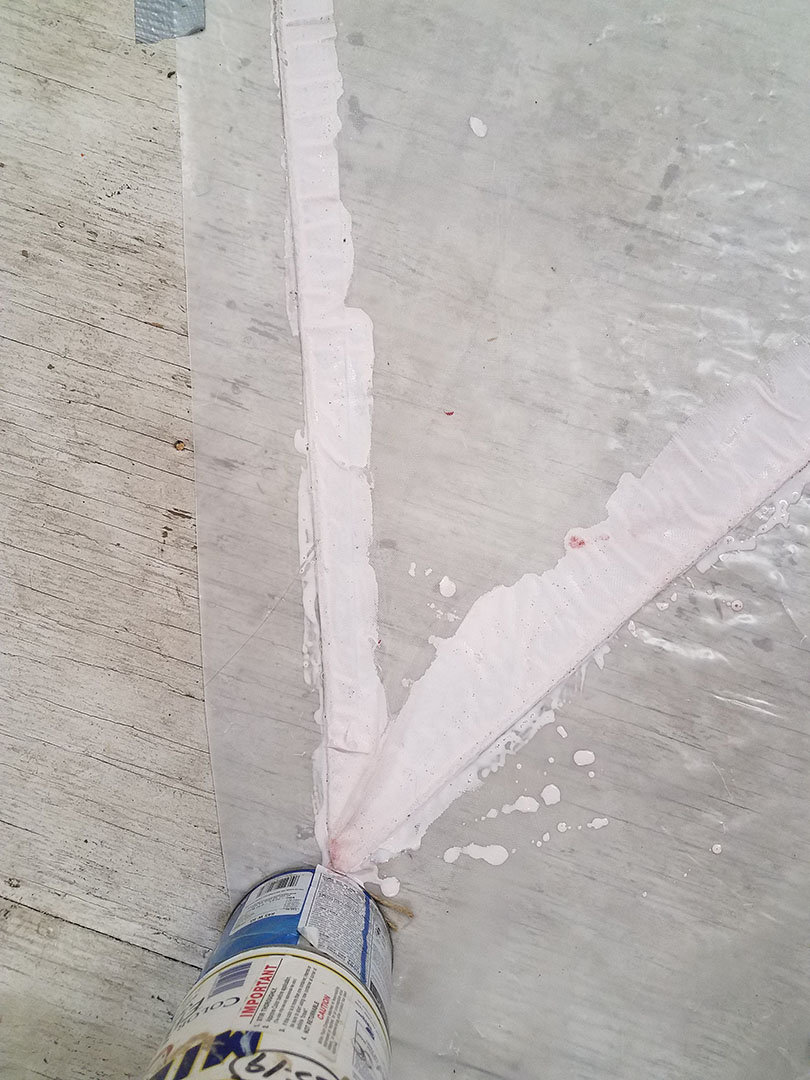
Edging does not have to be neat. Just use a brush or small roller to soak the edges with glue, directly on top of the folded-over tulle. The glue will soak through.
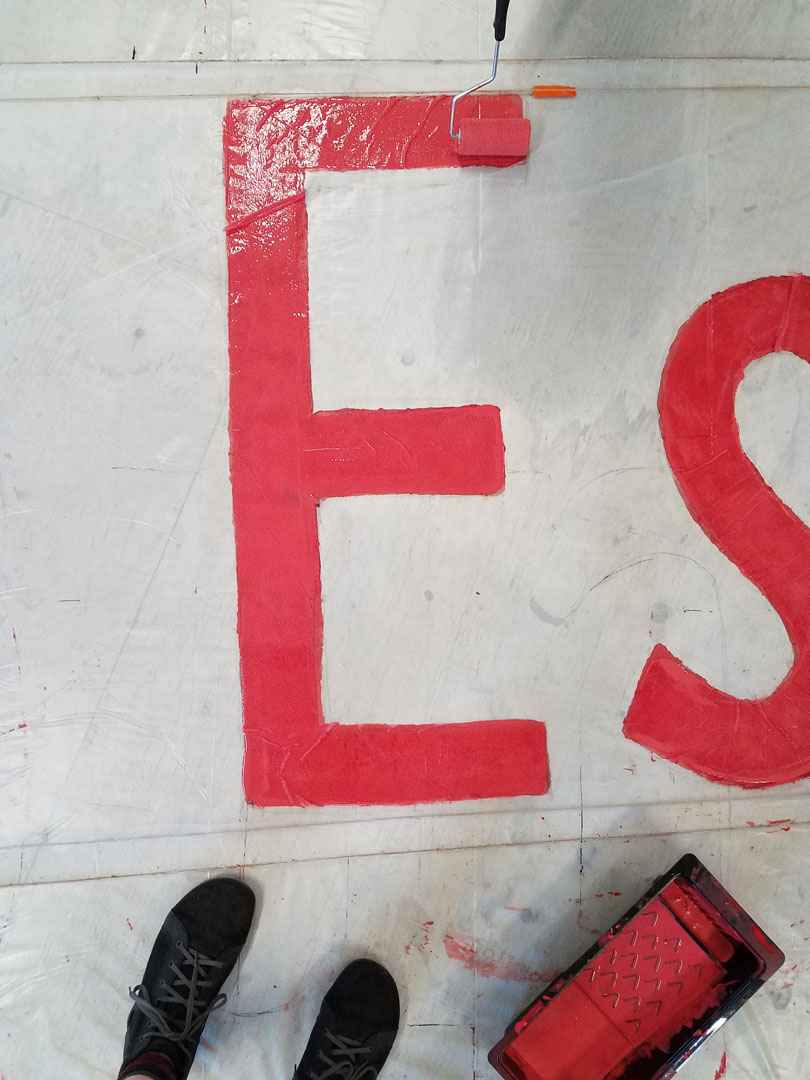
Letters should be somewhat neat but they will be seen from at least 50 feet away (probably farther) and no one will notice some rough edges and wrinkles.
applying the battens
The reinforcement battens can be applied after the glue dries, which takes at least 8-16 hours, or, if you painted the letters backwards, the battens can be applied directly after painting the letters.
Lay down the battens and put 4-5-inch-wide tulle strips over top. Soak with glue. If the batten won’t lay flat, use weights to push it down.
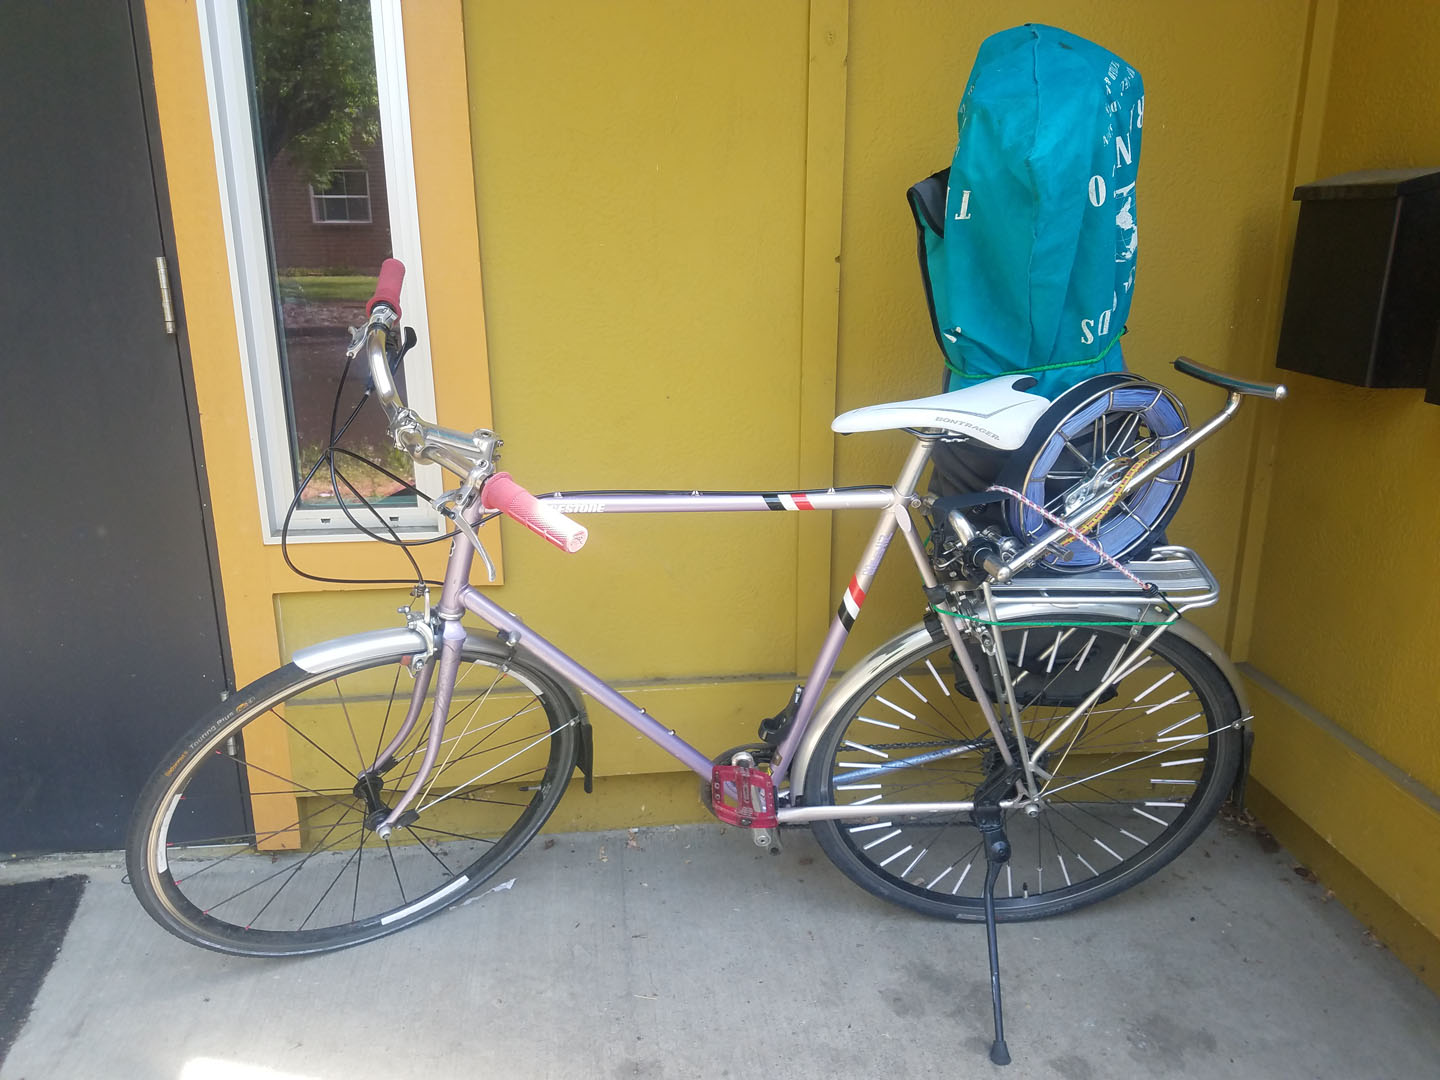
go fly
roll the banner up, put it on your bicycle, and go fly with a friend!
thanks
These instructions were refined with the help of Jayne Meacham, following them from a distance. Banner making required a lot of hands– special thanks to PEST and Colleen Donaldson. Most of the flight photos here are from photographer Mike Hastie, many thanks for his diligent work capturing these banner lifts.